Table of Contents
The content of this page is no longer maintained and could be outdated soon or already is. The reasons could be various, like this information became obsolete or there is by now a better way to handle the information on this page. This page will be retained here for archiving reasons.
Firefox
Mozilla Firefox is the browser from the Mozilla Foundation. Because I used Netscape Navigator as my first browser ever I am just used to its handling, features and look & feel. Because Firefox is a direct descendant of Netscape Navigator, it is still my favourite browser (just like Thunderbird is my favourite mailclient).
In Debian GNU/Linux Firefox is called 'Iceweasel'. All products from the Mozilla Foundation have been rebranded due to Trademark issues.
Because Mozilla moved to a fast-release scheme the Iceweasel versions in Debian get outdated really quick. For instructions how to install the latest version of Iceweasel please visit mozilla.debian.net. Of course I also added the instructions to my sources.list.
Bookmark Synchronization
You may know that problem: you've got quite a bookmark collection on your computer. But you also have multiple computers and/or operating systems that you use. Always exporting and importing your bookmark collection is not feasible, so a synchronization tool is the only option. This is where Xmarks kicks in, it is browser- and platform-independent.
This could already be the end of the story, just install Xmarks, create an account and you're ready to go. But as usual I am very concerned about privacy and don't want to put my bookmark collection – let alone my passwords – onto some external server I don't control. Here your own webdav server comes into play, you can set Xmarks to use your own server. This is by the way also the reason why I don't use Firefox Sync.
Installation
I'll assume you have successfully setup a webdav server and created at least one user.
To install the extension Xmarks you go to “Add-ons → Get Add-ons” (“Tools → Add-Ons → Get Add-ons” for Firefox 3.6 and older) in the Firefox menu. In the search-field type “xmarks” and the Add-on manager will find the extension for you. If it doesn't you may need to click the link “See all results” at the end of the result list. Just click the button “Add to Firefox” (or “Add to Iceweasel”) and Xmarks will be installed.
After the mandatory browser restart you are good to go.
Configuration
The configuration is done in a few steps (actually it's really just one 'real' step), but I provided some screenshots for your reference anyway.
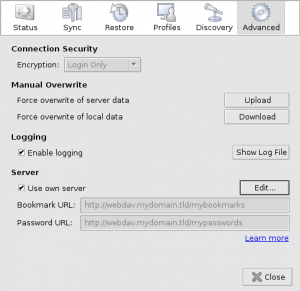
- Go to “Add-ons → Extensions” (“Tools → Add-ons → Extensions” for Firefox 3.6 and older) in the Firefox menu and click the button “Preferences” at the Xmarks extension. Alternatively, go to “Tools → Xmarks → Xmarks Settings…”.
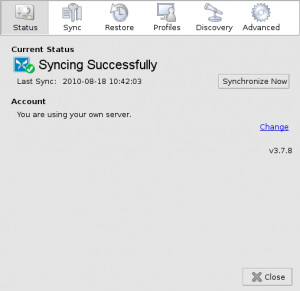
You will be shown the status page of Xmarks. - Go to the category “Advanced”, check the checkbox “Use own server” and click the “Edit…” button.
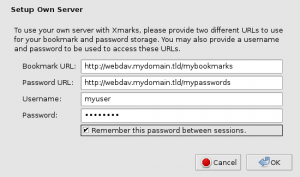
- Fill in your server information as created during the webdav installation. Make sure the URL contains a filename, not just a directory path (the file will be created). The Password URL is optional.
- Actually, that's it already. I recommend to install Xmarks on the computer/installation you use most (i.e. where your bookmark collection is the largest) at first and use the “Upload” button on the advanced page. This will upload (and overwrite) all bookmarks on the server.
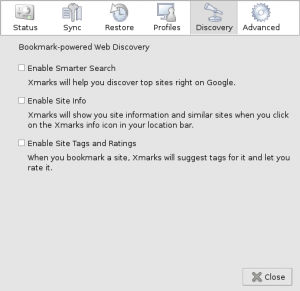
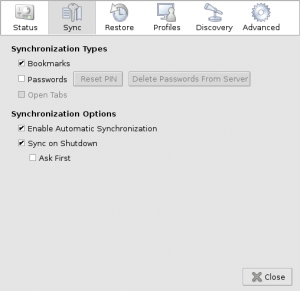
On a second computer/installation you can use the “Download” button to download all server bookmarks overwriting the local bookmarks. This way you'll be in sync from the beginning on. - Make sure to also check the “Sync Settings” (for automatic synchronization) and especially the “Discovery Settings” pages. On the latter page I tend to disable all options because it's IMHO annoying.
Enjoy the convenience!

